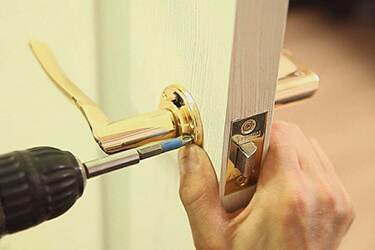
When it comes to home security, the importance of a properly functioning door lock cannot be overstated. Over time, locks may experience wear and tear, leading to issues such as jamming, sticking, or difficulty in turning the key. In this guide, we will walk you through the process of door lock repair, providing step-by-step instructions to help you address common problems.
Diagnosing the Issue
Before diving into the repair process, it’s crucial to identify the specific problem with your door lock. Common issues include:
a. Key Jamming
- Symptoms: Difficulty inserting or turning the key.
- Possible Causes: Dirt or debris in the keyway, a misaligned lock mechanism.
b. Sticky Latch
- Symptoms: The latch doesn’t smoothly retract or extend.
- Possible Causes: Buildup of grime, a misaligned strike plate.
c. Loose Doorknob
- Symptoms: A loose or wobbly doorknob.
- Possible Causes: Loose screws, worn-out internal components.
Tools and Materials
Gather the following tools and materials before starting the repair:
- Screwdriver (Phillips and flathead)
- Lubricant (graphite or silicone-based)
- Wire brush or toothbrush
- Replacement screws
- Replacement parts (if necessary)
- Hammer
- Pliers
Key Jamming Repair
a. Step 1: Inspect the Key
- Examine the key for signs of damage. If it’s bent or worn, consider getting a replacement.
b. Step 2: Clean the Keyway
- Use a wire brush or toothbrush to remove dirt and debris from the keyway.
c. Step 3: Lubricate the Lock
- Apply a small amount of graphite or silicone-based lubricant to the key and insert it into the lock. Turn the key several times to distribute the lubricant.
d. Step 4: Test the Lock
- Insert and turn the key to ensure smooth operation. Repeat if necessary.
Sticky Latch Repair
a. Step 1: Clean the Latch
- Remove the latch from the door using a screwdriver. Clean it thoroughly with a brush and lubricate the moving parts.
b. Step 2: Check the Strike Plate
- Ensure the strike plate is properly aligned with the latch. Adjust its position if necessary.
c. Step 3: Lubricate the Latch
- Apply lubricant to the latch and reattach it to the door.
d. Step 4: Test the Door
- Open and close the door to verify that the latch operates smoothly.
Loose Doorknob Repair
a. Step 1: Tighten Screws
- Use a screwdriver to tighten the screws on the doorknob. If they are loose, this may solve the problem.
b. Step 2: Check for Worn Components
- Disassemble the doorknob and inspect internal components for wear. Replace any worn-out parts.
c. Step 3: Reassemble the Doorknob
- Put the doorknob back together, ensuring all components are properly aligned.
d. Step 4: Test the Doorknob
- Verify that the doorknob is secure and doesn’t wobble. Test its functionality.
Additional Tips
a. Preventive Maintenance
- Regularly clean and lubricate your door locks to prevent future issues.
b. Professional Assistance
- If the problem persists or if you’re unsure about the repair, consider seeking the help of a professional locksmith.
Conclusion
Taking the time to address door lock issues promptly can enhance the security and functionality of your home. By following this comprehensive guide, you can confidently tackle common lock problems and ensure that your doors provide the protection they are designed for. Remember, regular maintenance goes a long way in preserving the longevity of your door locks.


