
[ad_1]
Coffee Facts Science
To improved evaluate the big difference between the prime and base of just about every hole
Cameras have enormously innovative over the a long time making it possible for people today to choose substantial quality photographs. When this can be practical for laptop eyesight programs, frequently very simple adjustments in style and design of experiment can enormously improve the excellent of these photos for specific applications. Enter coffee!
For a couple many years, I have been making use of my picture processing techniques to picture espresso filter baskets. Two several years ago, I looked at making an attempt to impression the leading and bottom to measure for every gap styles. Having said that, this investigation halted when I experienced some difficulties aligning the pictures routinely. Recently, I have been at it yet again, but I used guide alignment to enhance the procedure.
Although accumulating some information, I recognized my imaging setup could also be improved, so let’s examine them in this article.
Imaging espresso baskets is tough for a several motives:
- Metal baskets and reflectivity
- The holes are small
- Camera lens have curves
I have labored on modifying for lots of of these items via knowledge collection SOP and write-up-processing.
I use a few standardized tools:
- A tablet monitor to illuminate the basket holes
- A dim area to isolate other light-weight sources
- Reduced publicity to tackle reflections of the tablet display screen off of the basket back again to the digital camera.
I have a semi-automatic process to make processing much easier:
- Label basket applying a blue circle
- Manually threshold illustrations or photos
- Mechanically clear away non-holes
- Readjust any ellipse shaped gap to a circle condition.
- Change illumination throughout the filter
Initially, the quantity of light for the measurement of the best of the filter really should match the measurement from the bottom.

So I created a collar using a paper cup to hold the filter exactly where the top (the inside of of the basket) would be at the exact peak as the base of the filter when it is flipped more than.

Then I also created an adjustment for lighting. The whole screen is wanted to calibrate the impression (# of pixels for every millimeter), but any lights not underneath the filter demonstrates off of the digital camera (my cellphone camera) back onto the filter.
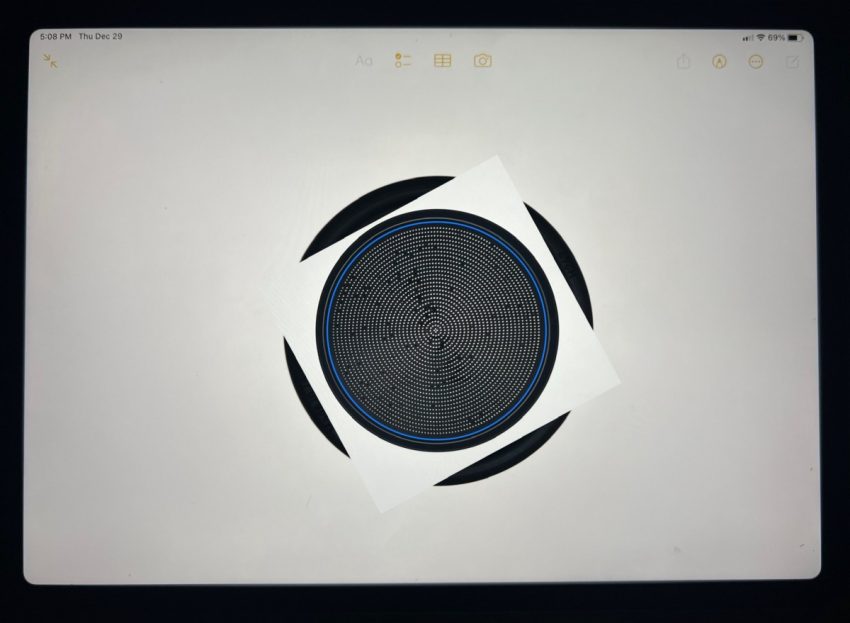
To remove this, I used the complete monitor brightness for calibration, and I just take another graphic with a white circle in the center. This removes the reflection issue.

But then I need calibration! To make sure the illustrations or photos are aligned presented that the cellphone could change (even in a stand), I manually align the illustrations or photos in the application Procreate. I imagined this would be a lot more complicated, but it is quite straight-ahead with layers and 50% transparency. I also found enjoyable items like how symmetric VST filter baskets are.

I use the calibration impression to align each the major and bottom pictures so that all the things is calibrated to the exact scale. This requires linear resizing and item rotation until the holes are best or most aligned. I have to mirror the bottom graphic to make positive the holes are correctly aligned with the leading impression.

Then I run these pictures via my algorithm. Beneath are the major and bottom illustrations or photos of the Wafo Classic in fake colour to depict gap measurement. There is a splotch of blue in the graphic of the prime (on the still left), and this is not because of to some other concern. It is a persistent aspect in multiple captures.


These distributions can be utilised to much better understand a filter basket.

[ad_2]
Source connection