
Lightsaber Drawing Step by Step
It’s hard to ignore the impact that Star Wars has had on our lifestyle and media. With 9 films and endless books, Projects, toys, PC games from that point, anything is possible, Star Wars has unquestionably taken command over our planet! There are such endless unquestionable parts in the Star Wars universe, and one of the most popular is the lightsaber.
This direct yet extraordinarily cool-looking weapon is something many fans need to guarantee, in reality! While certifiable lightsabers may be two or three years off, sorting out some way to draw a lightsaber can be the accompanying best thing. To know how to design your own lightsaber, then, this is the best assistant for you! Our little by little aide on the most capable technique to draw a lightsaber will let you know the most effective way to duplicate this bewildering weapon.
Stage 1 – lightsaber Drawing
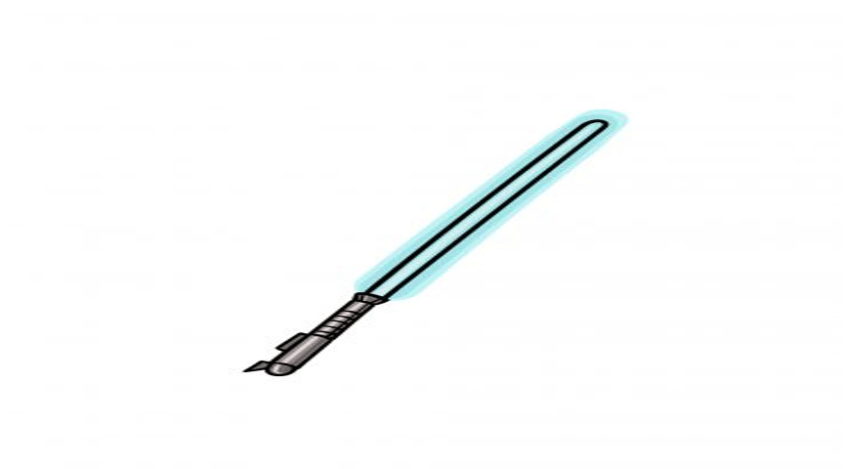
To get this helper on the most capable strategy to draw a lightsaber going, we will start with the laser edge of the weapon. There are actually several different ways that you could move toward drawing this, and we will cover some of them. In our reference picture, we used areas of strength for a line to make the diagram of the bleeding edge.
This will help with giving it some definition, but you could in like manner make it using essentially assortment. If you should take on this methodology, you could include a light pencil for now so you have the design as an essential concern. Then, in the last step where we add tone, we will examine how you can make the edge using assortment.
Stage 2 – Next, start drawing the handle of the lightsaber
Without a handle, lightsabers wouldn’t be excessively pleasing to try and think about holding! In this way, we will draw the handle for your lightsaber drawing now. Each lightsaber has a fascinating handle, and if you like, you could investigate a picture of the handle for your #1 Star Wars character’s lightsaber and draw a piece of the nuances onto this one.
Whether or not you that, the procedure will be comparable to what we show in this assistant. You can characterize two straight limits making ready to the front line of the lightsaber, and subsequently add a little edge fanning out at the part where the handle meets the sharp edge.
Stage 3 – Draw the rest of the handle
In this third step of our helper on the most capable strategy to draw a lightsaber. We will draw the rest of the design for the handle. This should be very easy to do, and you can simply shape onto the piece of the handle that you drew at this point. Draw the straight piece of the handle a piece further down, and subsequently toward the end you can att a changed tip.
That will finish the system of the handle, and subsequently you will be ready to add an extra nuances to it in the accompanying several means, so we ought to proceed!
Stage 4 – As of now, draw a couple of extra nuances for the handle
As we referred to in the last piece of your lightsaber drawing, in this step we will add a nuances to the handle. These nuances will be extremely confined for the present, but we will develop them later.
In any case, characterize a limit across the handle at the underpinning of the edge where the sharp edge is arising. Then, characterize another limit across the handle near the point of convergence of it.
We will then, add a slight, rectangular shape onto the left-hand lower side of the handle to do the switch. Finally, you can characterize one more limit across the handle and subsequently add a little, sharp shape to the lower part of it.
Stage 5 – Add a last nuances to your lightsaber drawing
As of now you’re ready to finish the last nuances of your picture in this fifth step of our helper on the most capable technique to draw a lightsaber! You can add a couple of extra lines across the handle and give it some more subtle line specifying. Then, at that point, before you close off this step you could moreover draw your own personal few nuances!
We referred to how you could change the energy of the handle to appear to be a most cherished character’s lightsaber. Yet you could go a lot further and draw the individual themself! How should you finish this image?
Stage 6 – Finish your lightsaber drawing with some tone
You will finish this lightsaber drawing with some assortment in this last step. For our model, we included grays for the handle while including blue for the edge. You could use fundamentally any tones you like for it, as lightsabers show up in a wide combination of assortments! We referred to that there are several different ways of depicting the edge, and we will examine them now.
If you used a pencil to draw the sharp edge, you could assortment the point of convergence of the front line with a hazier interpretation of the assortment you would like for it. Then, use an assortment incline by including ceaselessly lighter shades of that tone for the district incorporating the edge.
This will cause it to appear like it is discharging some light. You could similarly include a more outrageous craftsmanship medium like concealed markers for the center and subsequently use something gentler like watercolors for the outer edge.